The Export Fieldsets page lets you customize data exports. Create focused exports that include your choice of fields, and give the export a meaningful name. Export fieldsets can be public (shared across the utility) or private (accessible only by the user that created the export fieldset).

Follow the instructions below, and watch this how-to video for more information.
To define a Fieldset:
- Click a radio button to select one of:
• Latest Reads
• Date Range
• Billing Reads
• Exception History
• Consumption.
- Click Add.
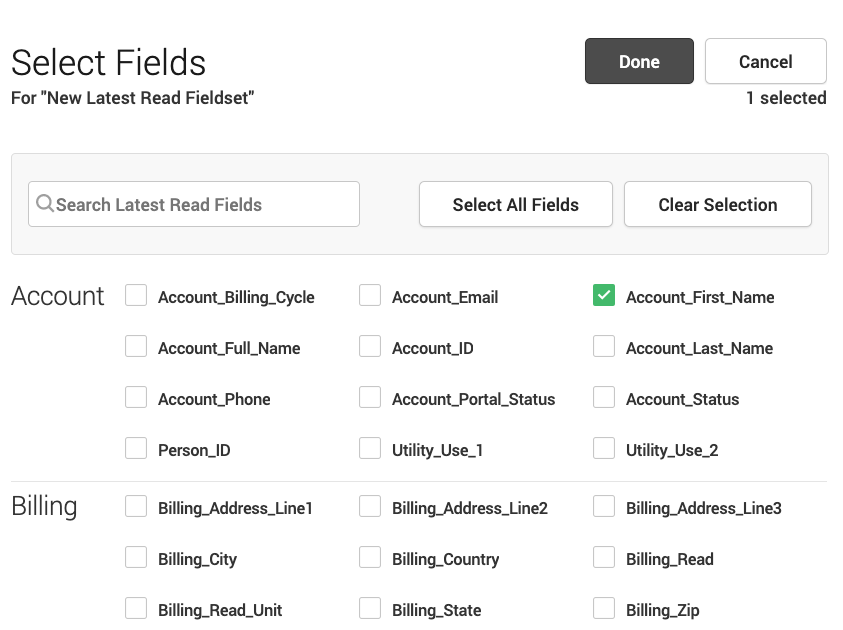
- Click Add/Remove Fields.

- Click the boxes next to the fields you want to include.
• To select all of the fields, click Select All Fields.
• Click Clear Selection to start over.
• To search for a field of interest, start typing in the search box.
TIP: To jump to fields that contain IDs: Type ‘id.’
Type ‘sn’ to select the Endpoint or Meter serial number fields
Type ‘date’ to select date related fields: Endpoint Install Date, Current Leak Start Date, Meter Install Date, and Service Agreement Start Date.
- When finished, click Done. You will see the Edit Fieldset screen:
- Make the fieldset Private (leave the Is Public box unchecked) or Public (check the Is Public box).
- Change the file extension from the .csv to any desired extension. For example, .txt or .dat.
NOTE: Be sure to include the dot (.) when typing the extension. - Use the Encoding drop-down menu to choose an encoding format.
- Toggle Header Visibility on and off.
- Use the Line End drop-down menu to choose Windows or Unix-friendly line endings.
- Use the File End drop-down menu to choose to end a file with Nothing or a New Line.
- Use the Field Separator drop-down menu to choose one of: coma (,), colon (:), pipe (|), semi-colon (;), or tilda (~) as a delimiter.
- Use the Quoting Option drop-down menu to choose one of All, Minimal or None.
- Click Save to store the current fieldset or click Cancel to discard it.

- When finished, click Done. You will see the Edit Fieldset screen:

From this screen you can:• Name the new Fieldset by typing in the Name box.
• Select the desired File Format (Delimited or Fixed Width).
If you select Delimited as the File Format, click Show Advanced Options to:
• Make the fieldset Private (leave the Is Public box unchecked) or Public (check the Is Public box).
- • Change the file extension from the .csv to any desired extension. For example, .txt or .dat.
- • Use the Encoding drop-down menu to choose an encoding format.
- • Toggle Header Visibility on and off.
- • Use the Line End drop-down menu to choose Windows or Unix-friendly line endings.
- • Use the File End drop-down menu to choose to end a file with Nothing or a New Line.
- • Use the Field Separator drop-down menu to choose one of: coma (,), colon (:), pipe (|), semi-colon (;), or tilda (~) as a delimiter.
- • Use the Quoting Option drop-down menu to choose one of All, Minimal or None.
- • Click Save to store the current fieldset or click Cancel to discard it.
- Click Select Fields to get a list of available fields to include in the current field set.
-

If you select Fixed Width as the File Format, click Show Advanced Options to:
-
-
- Make the fieldset Private (leave the Is Public box unchecked) or Public (check the Is Public box).
- Change the file extension from the .csv to any desired extension. For example, .txt or .dat.
- Use the Encoding drop-down menu to choose an encoding format.Use the Line End drop-down menu to choose Windows or Unix-friendly line endings.
- Use the File End drop-down menu to choose to end a file with Nothing or a New Line.
-

-
-
- When creating Fixed Width format exports, use the More Options drop-down menu (circled in red above) to:
-
- Duplicate a field.
- Add a Filler field above the current field.
- Add a Filler field below the current field.
-
-
TIP: Duplicate the Read Time field to use one instance as the Read Date and the second instance as the Read Time.

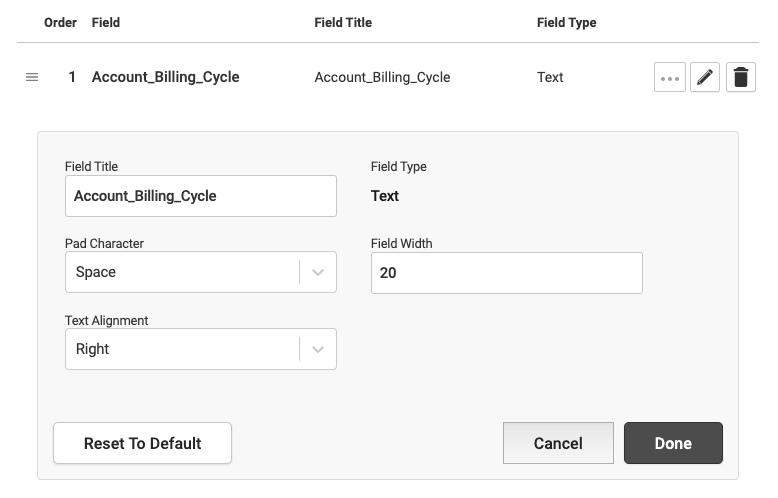
For Text and Number fields, click the pencil icon to:
-
-
-
- Customize the Field Title by typing a new name.
- Use the Pad Character drop-down menu to choose either Space or Zeros (0) as the filler character.
- Enter a number to set Field Width.
- Use the Text Alignment drop-down menu justify text right, left or centered.
- Click Reset to Default to undo changes.
- Click Done to close the dialog.
-
-

For Date fields, click the pencil icon to perform any operation described for Text and Number fields, and to:
-
-
-
- Modify the date in the Format box.
- TIP:To export a date without any time information enter: %Y-%m-%d, where Y = year, m = month, and d = day. To rearrange the order to return day – month – year, enter: %d-%m-%Y.
- Click Select Fields to get a list of available fields to include in the current field set.
-
-
• Name the new Fieldset by typing in the Name box.
• Make the fieldset Private (leave the Is Public box unchecked) or Public (check the Is Public box).
• Click Save to store the current fieldset or click Cancel to discard it.
• Click Select Fields to get a list of available fields to include in the current field set. -
- If desired, click-drag the icon (circled in red below) on the left side of a given field to move it.

- To rename a field:
• Click the pencil icon.
• Type the desired name in the Field Title box.
• Click Done to save your changes. Click Cancel to abort.
• Click Reset to Default to revert to the original field title.NOTE: It is strongly recommended that you do not create duplicate field names.

In this example, Meter_SN has been renamed Meter Badge.
- When you are finished, click Save. Click Cancel to discard your work.
- Added fields can be removed by using Delete icon next to the Fields.After they have been created, Public and Private fieldsets for each export type are displayed in the order they were created on the Export Fieldsets tab.Click one of the radio buttons to see the corresponding fieldsets.
The image below shows two custom export fieldsets for Latest Reads.
This image shows a custom export fieldset for Exception History.

To make changes to a fieldset, click the pencil icon.To delete a fieldset, click the trash icon.To copy a fieldset, click the copy icon (
 ).
).
TIP: Copying a fieldset is a convenient way to jumpstart the process of customizing exports.
To use the new Fieldset, go to the Monitor page>Actions menu>Export Options>Fieldset, and select it.

Watch this how-to video for more information.